Updating the BIOS (Basic Input/Output System) of a motherboard is a crucial task that can enhance the performance and compatibility of your computer. The BIOS is the firmware that initializes hardware during the startup process and provides a bridge between the operating system and the hardware. For users of Gigabyte motherboards, renowned for their reliability and performance, updating the BIOS can ensure that their systems run efficiently with the latest hardware and software technologies. This article guides you through the process of updating the BIOS on a Gigabyte motherboard, explaining why it’s important, what you need to prepare, and how to safely complete the update. Whether you’re a seasoned technician or a novice, this guide aims to provide clear, step-by-step instructions to help you keep your system up-to-date and running smoothly.
How To Update Gigabyte Motherboard Bios?
Updating the BIOS of a Gigabyte motherboard can be a straightforward process if done correctly. Here are seven key steps to guide you through the process:
Identify Your Motherboard Model
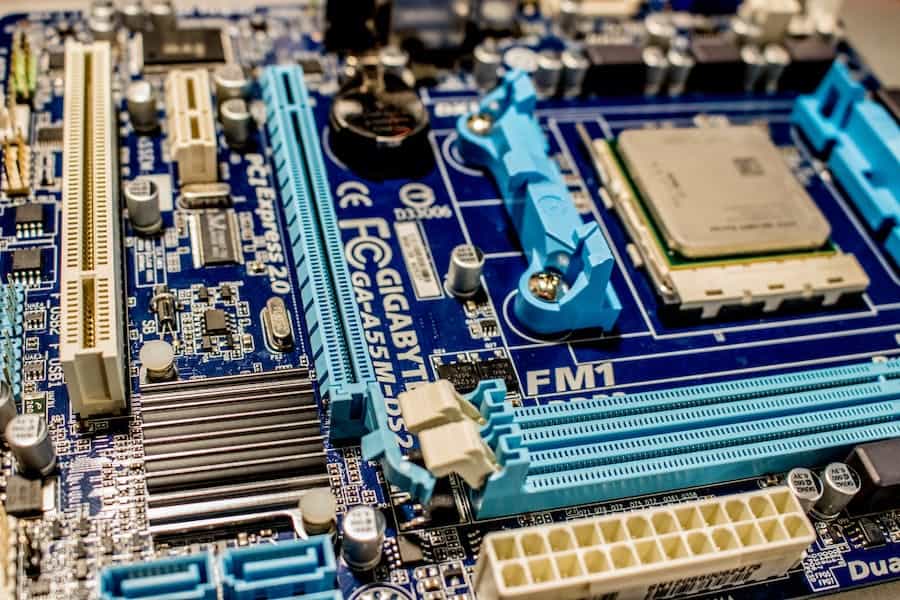
Before you can update your BIOS, you need to know exactly which Gigabyte motherboard model you have. This information can usually be found in your system’s documentation, on the motherboard itself, or through a system information tool in your operating system.
Backup Your Data
It’s always a good practice to back up important data before performing system updates. While a BIOS update typically doesn’t affect the data on your hard drives, it’s better to be safe in case of unexpected issues.
Check The Current BIOS Version
Determine the current BIOS version of your motherboard. You can do this by entering the BIOS during startup (usually by pressing a key like F2, Del, or Esc) or through system information tools in the operating system.
Download The Latest BIOS Update
Visit the official Gigabyte website and navigate to the support page for your specific motherboard model. Download the latest BIOS version. Make sure to read any release notes or instructions provided on the website.
Prepare The Update Method
Most Gigabyte motherboards support updating BIOS from a file stored on a USB flash drive. Format the USB drive to FAT32 and copy the downloaded BIOS file to it. Alternatively, some motherboards may support updating directly through the internet or a Windows-based utility provided by Gigabyte.
Update The BIOS
Reboot your computer and enter the BIOS setup. Locate the BIOS update section (often named Q-Flash for Gigabyte motherboards), and select the update option. Choose the BIOS file on the USB drive and proceed with the update. Make sure not to interrupt the update process (e.g., by turning off the computer).
Verify And Configure BIOS Settings
After the update, check the BIOS version to ensure the update was successful. It’s also a good time to review and configure BIOS settings as some may have reset to defaults. Pay particular attention to boot order and performance settings.
Where To Find Bios Updates?
Finding BIOS updates for your Gigabyte motherboard involves visiting the official Gigabyte website and navigating to the support section for your specific motherboard model. Here’s a step-by-step guide on where to find BIOS updates:
- Visit The Gigabyte Website: Open your web browser and go to the official Gigabyte website.
- Select Your Region: Gigabyte’s website may ask you to select your region or country. Choose the appropriate region to ensure you get accurate support information.
- Navigate To The Support Section: Hover your mouse cursor over the “Support” tab in the website’s navigation menu. This will typically be found at the top of the page.
- Choose “Downloads” or “Support & Downloads”: In the dropdown menu that appears when you hover over “Support,” you’ll often find options like “Downloads” or “Support & Downloads.” Click on one of these options.
- Enter Your Motherboard Model: You will be prompted to enter your motherboard’s model name or number. This information is crucial to ensure you get the correct BIOS update. Refer to your motherboard’s documentation or use system information tools to find the model name/number.
- Select Your Operating System (Optional): If prompted, select your operating system (e.g., Windows, Linux) from the list. This can help filter the search results to show relevant downloads.
- Locate The BIOS Section: Once you’ve entered your motherboard model, you should see a list of available downloads and updates related to your motherboard. Look for the section that specifically mentions “BIOS” or “UEFI BIOS.”
- Download The Latest BIOS Update: In the BIOS section, you should find the latest BIOS version available for your motherboard model. Click on it to access the download page.
- Read Release Notes And Instructions: Before downloading the BIOS update, take a moment to read any release notes or instructions provided on the download page. This information may contain important details about the update process or any specific requirements.
- Download The BIOS Update File: Click the download button to save the BIOS update file to your computer. Ensure that you download the correct version and follow any naming conventions provided.
Tips On What To Do If Something Goes Wrong During The Update.
If something goes wrong during a BIOS update on your Gigabyte motherboard, it can be a stressful situation, but there are steps you can take to recover from it. Here are some tips on what to do if something goes wrong during the update:
- Stay Calm And Do Not Panic: It’s essential to remain calm and composed. Panicking can lead to hasty decisions that may worsen the situation.
- Do Not Turn Off The Computer: If the BIOS update appears to be stuck or frozen, do not force a shutdown by turning off the computer. Abruptly cutting power during a BIOS update can result in a bricked motherboard.
- Wait Patiently: Sometimes, the BIOS update process can take longer than expected. Give it some time, even if it seems to be progressing slowly. It’s normal for the system to appear unresponsive during certain stages of the update.
- Check For Error Messages: If you encounter an error message or a specific issue during the update process, take note of the error message. It may provide valuable information about the problem.
- Refer To The Motherboard Manual: Consult your motherboard’s manual or the documentation provided by Gigabyte. Look for troubleshooting sections related to BIOS updates. Some manuals may have specific instructions for recovery.
- Use BIOS Recovery Features: Many Gigabyte motherboards come with BIOS recovery features, such as Dual BIOS. Refer to your motherboard’s manual to understand how to use these features for recovery. These features are designed to help you recover from failed BIOS updates.
- Try Clearing CMOS: Clearing the CMOS (Complementary Metal-onxide-semiconductor) can sometimes help recover from a failed BIOS update. Refer to your motherboard manual for instructions on how to clear the CMOS. This typically involves resetting the BIOS settings to their default values.
- Contact Gigabyte Support: If you are unable to resolve the issue on your own, consider reaching out to Gigabyte’s customer support. They may provide guidance on how to recover from a failed BIOS update. Be prepared to provide them with detailed information about your motherboard model and the issue you encountered.
- Seek Professional Help: If all else fails, and you are unable to recover from the failed update, it may be necessary to seek professional assistance from a computer technician or a Gigabyte-authorized service center.
Conclusion
In conclusion, updating the BIOS on your Gigabyte motherboard is a crucial maintenance task that can enhance system performance and compatibility. While it offers significant benefits, it’s essential to approach the process with caution and preparedness. This guide has provided you with the necessary steps to locate and execute a BIOS update. Remember that BIOS updates carry some risk, so it’s crucial to follow instructions carefully and be prepared for potential setbacks. By staying informed and taking appropriate precautions, you can ensure that your Gigabyte motherboard continues to serve you efficiently and reliably.
FAQ’s
Is It Necessary To Update My Motherboard’s Bios?
Not always. Only update if there’s a specific issue or if the update provides benefits like improved hardware support or stability.
Can I Update My Gigabyte Motherboard’s Bios From Within Windows?
Yes, Gigabyte provides Windows-based utilities like @BIOS for updating the BIOS. However, it’s recommended to use the Q-Flash method for safety.
What Should I Do If The Power Goes Out During A Bios Update?
If possible, use a UPS (Uninterruptible Power Supply). If a power interruption occurs, it can potentially brick your motherboard.
Can I Revert To A Previous Bios Version After Updating?
In most cases, reverting to an older BIOS version is not recommended or supported. It’s essential to carefully consider updates.
How Do I Check My Current Bios Version In Windows?
You can use system information tools like “msinfo32” or third-party software like CPU-Z to check your BIOS version in Windows.









Leave a Reply